
Build your first SceneLoft project
Learn the complete workspace while assembling a title card from editable layers.
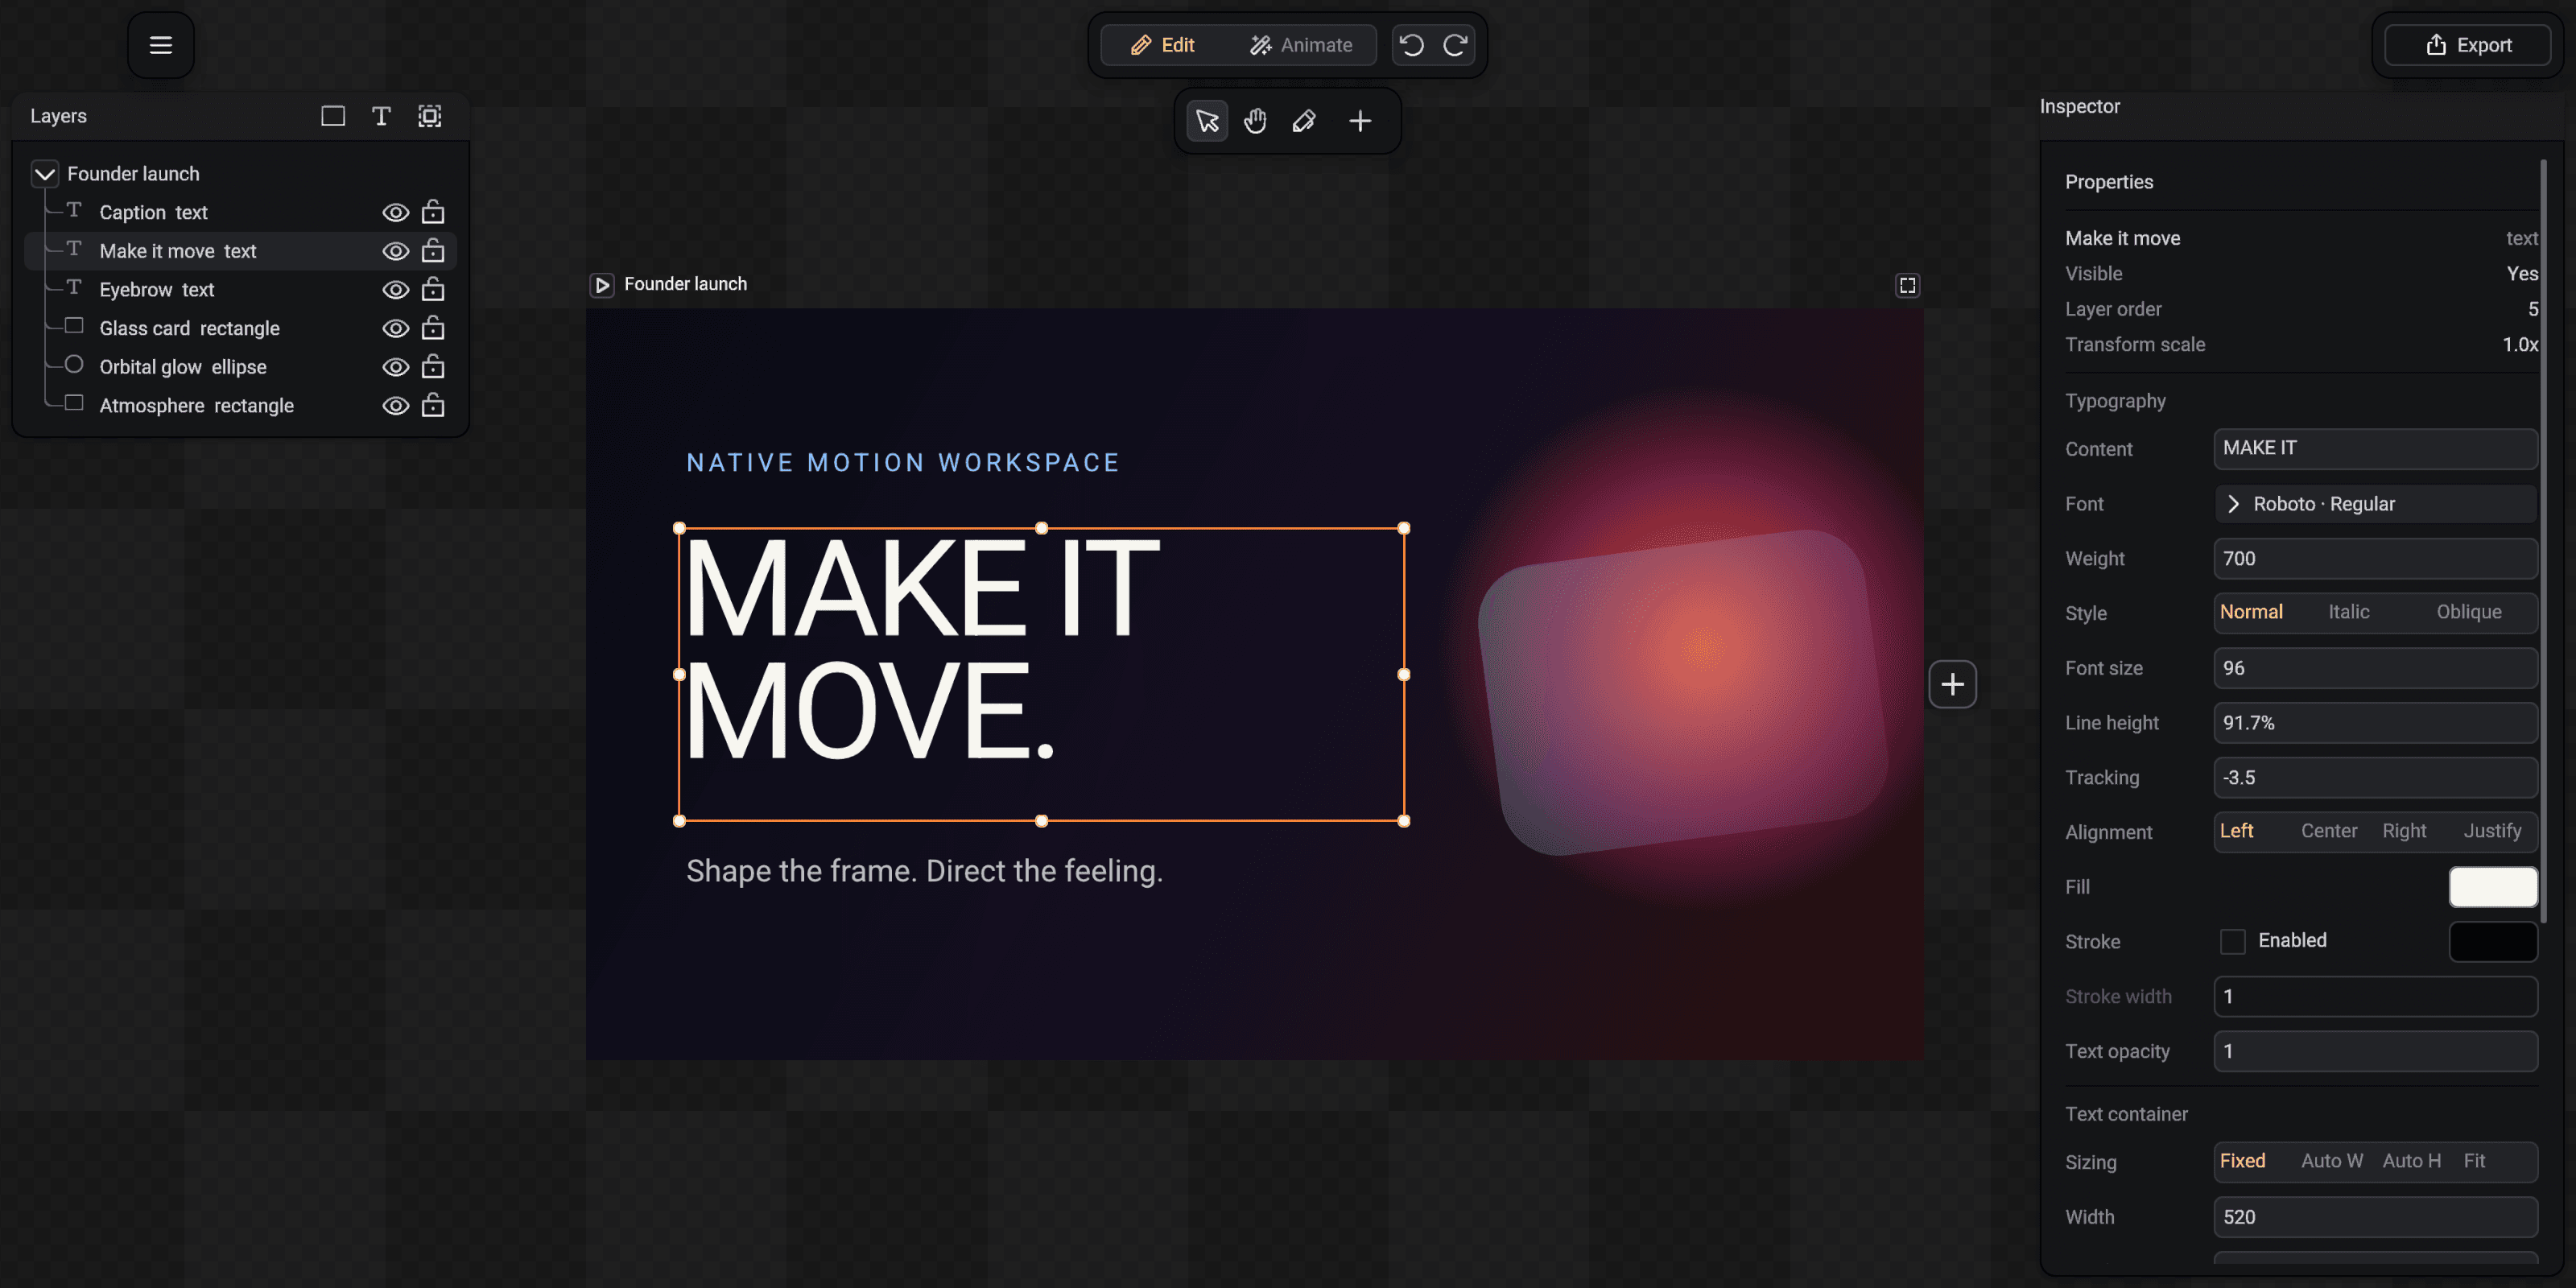
A project is one designed frame with its own size, duration and layers. This tour explains the controls that remain present throughout the normal 2D workflow.
Read the workspace
The canvas is in the center. Layers describes what is inside the selected project, and the Inspector exposes the editable properties of the current selection. The top bar holds the menu, Edit or Animate mode, undo and redo, and Export.
The compact toolbar above the canvas contains Select, Hand, Pen and Add. Hover an icon to see its name before choosing it.
- 1Layers and hierarchy
- 2Project canvas and tools
- 3Selection properties
Create a project
Open the top-left menu, choose New, and start with a blank project or a template. Social and video presets establish the project dimensions and frame rate for you.
A project title sits just above its frame. Select the frame itself when you want to rename it or edit project width and height in the Inspector.
Add and arrange content
Press Add in the canvas toolbar and choose Rectangle, Ellipse, Arc, Star, Line, Text or Import image. The new object is inserted into the active project as an ordinary editable layer.
Move and resize directly on the canvas. Use the Inspector for exact values, appearance controls and properties that do not need a handle.
Switch from design to motion
Edit is for content, hierarchy and appearance. Animate opens the timeline and compatible animation presets without creating a second copy of the design.
Save the document from the menu, with Cmd + S on macOS or Ctrl + S elsewhere. Export is a separate delivery step and does not replace the editable SceneLoft document.